metalboy 👾
metalboy is a Game Boy emulator I made for my BSc dissertation project. I’m not sure how much of the dissertation I’m allowed to share, but I’ll include some of the more interesting excerpts here. Feel free to check out the source code in the repo linked above.
Why a Game Boy emulator?
I’m very much a practical person, and my dissertation was something I was dreading since a BSc typically involves theoretical / investigative work. Luckily, I happened to have a module called Video Games Programming in my 3rd year and it was run by a great lecturer who taught almost entirely practical & project based courses. The courses he taught (Video Games Programming, Web Development) were designed for the final assignment to be something worth putting on a portfolio1.
Anyway, when I asked about him supervising the project he said it sounded great but that he doesn’t have much experience in hardware emulation so the project side of things would be mostly self-guided.
The other reason I chose an emulator is because I had written a CHIP-8 emulator a year prior to my dissertation and found it to be really fun. There’s something deeply interesting about writing a program that can run programs made by other people, intended for an entirely different platform. It’s worth mentioning though, that a Game Boy emulator is a much larger undertaking than a CHIP-8 emulator, and there was a lot to learn before starting.
This got approved… How?
There are two main issues with proposing this as a project. Firstly, it could be argued that I’m not really solving any problems since hundreds of Game Boy emulators already exist. Secondly, emulators are in a legal and ethical grey-area, given that they can be misused for piracy.
Not solving any problems
True, nobody needs another Game Boy emulator in the world. But there is a case to be made for video game preservation and separately the code and the emulator itself can act as a low-level hardware teaching tool. Take for instance, that I developed two front-ends for the emulator. There’s a standard front-end that simply plays ROMs, and there is a debug front-end that lets you peek into the inner workings of the emulated computer.
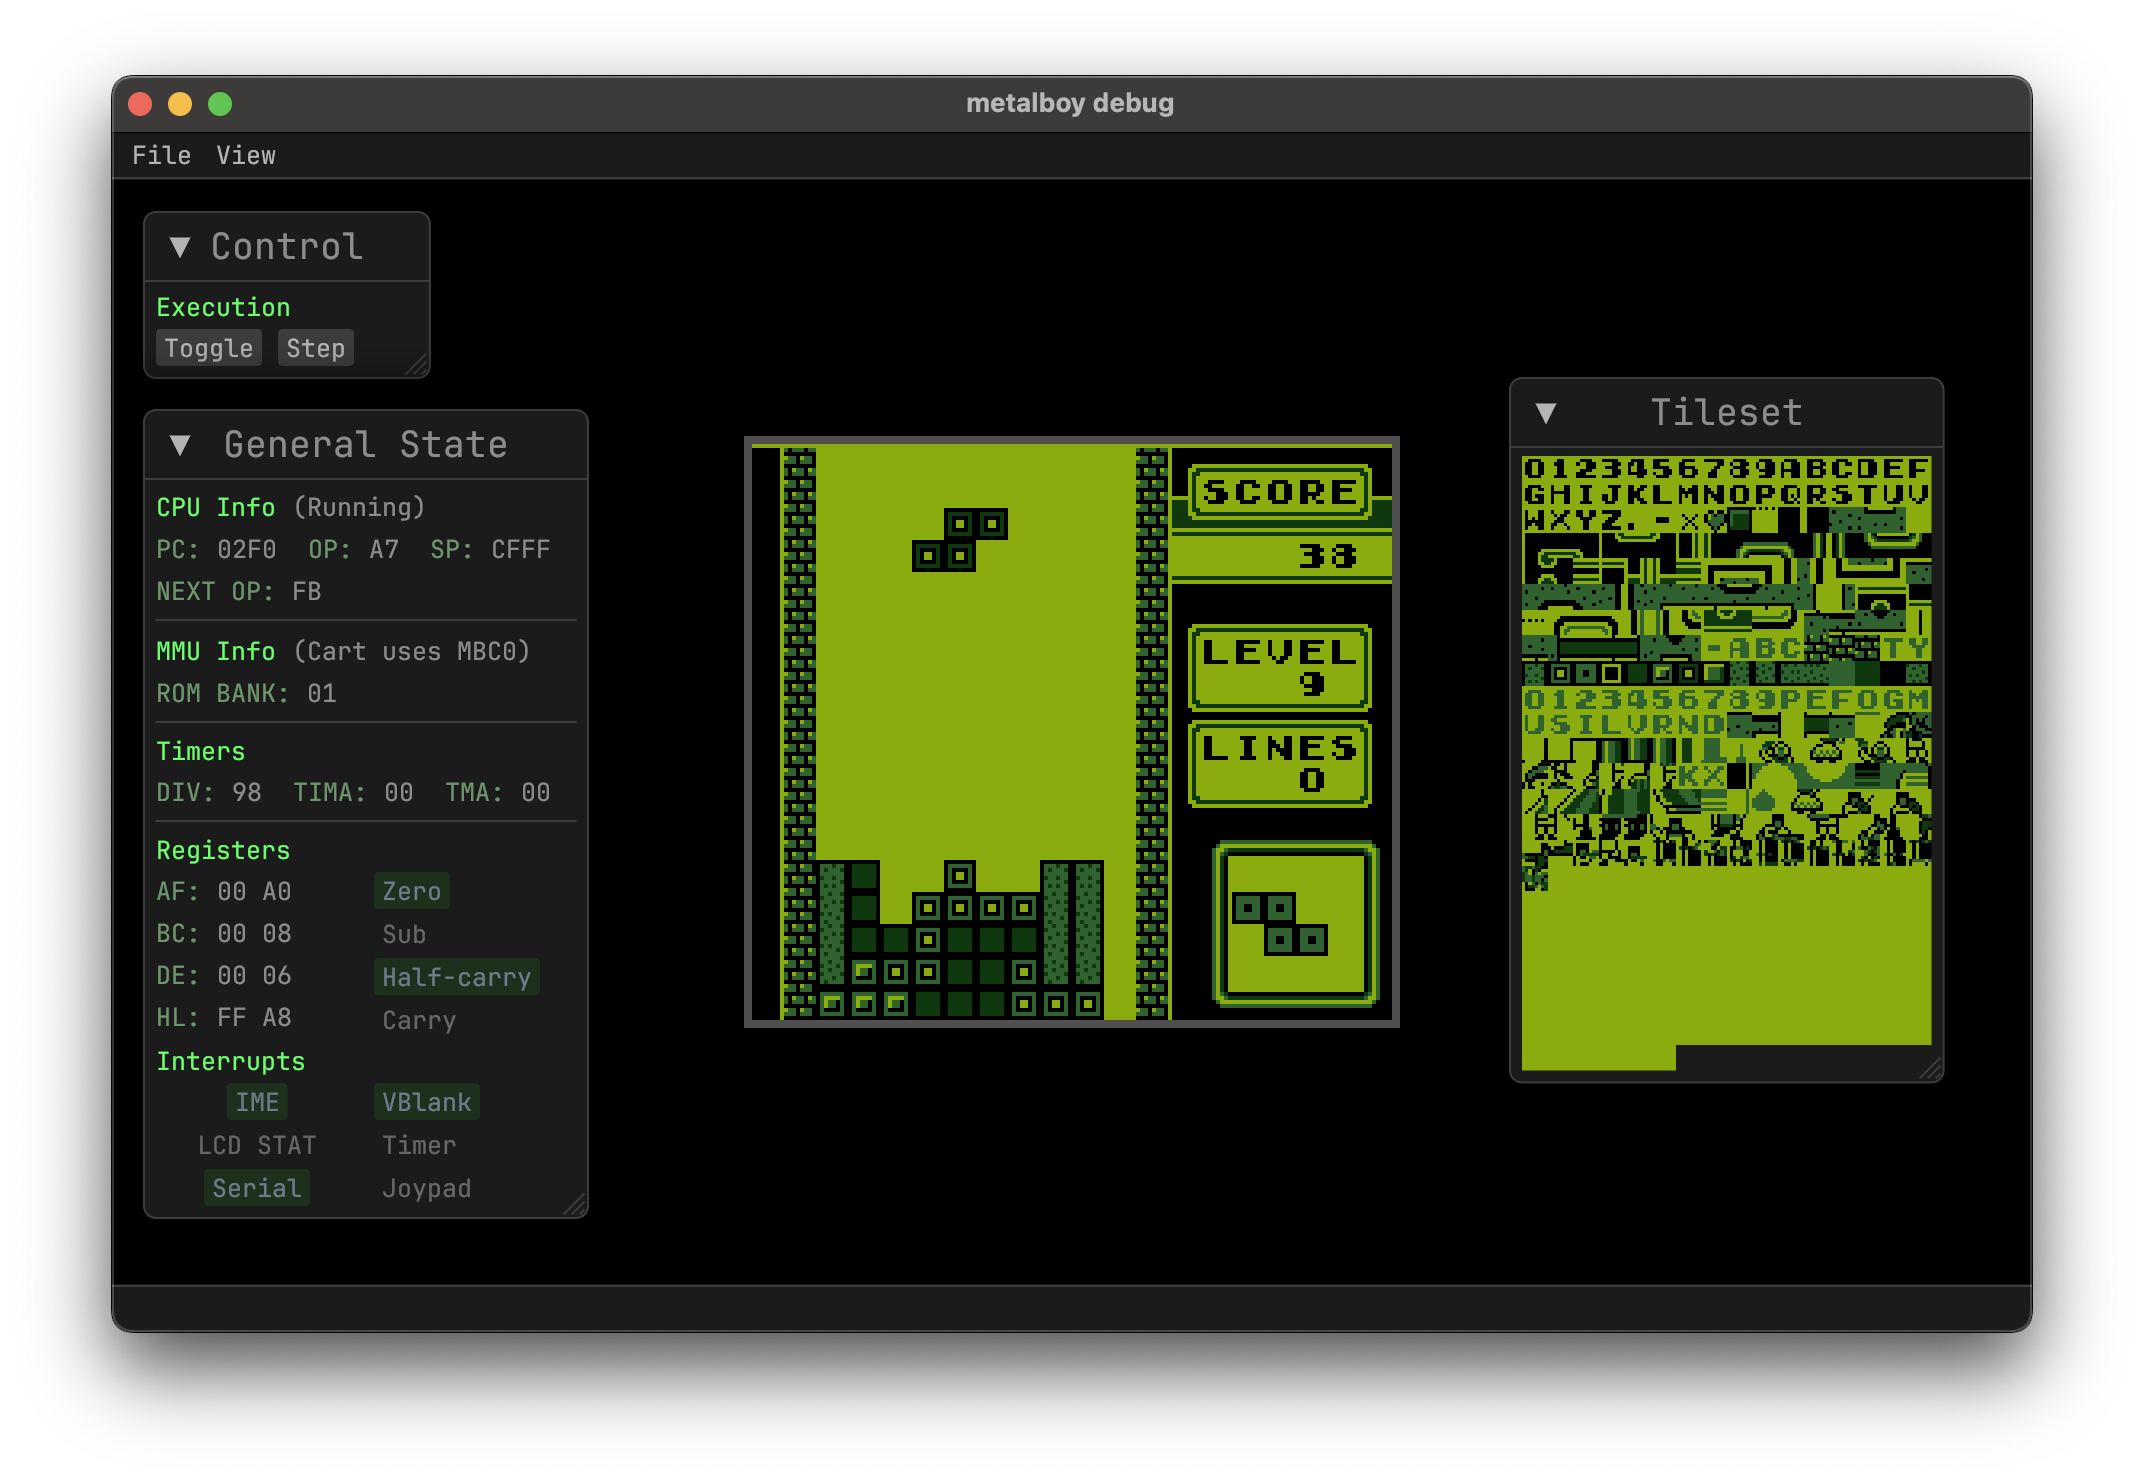
Debug front-end
- Register values
- MMU info, including current MBC and selected bank
- Timer register values
- Flag register interpretation
- CPU interrupt status
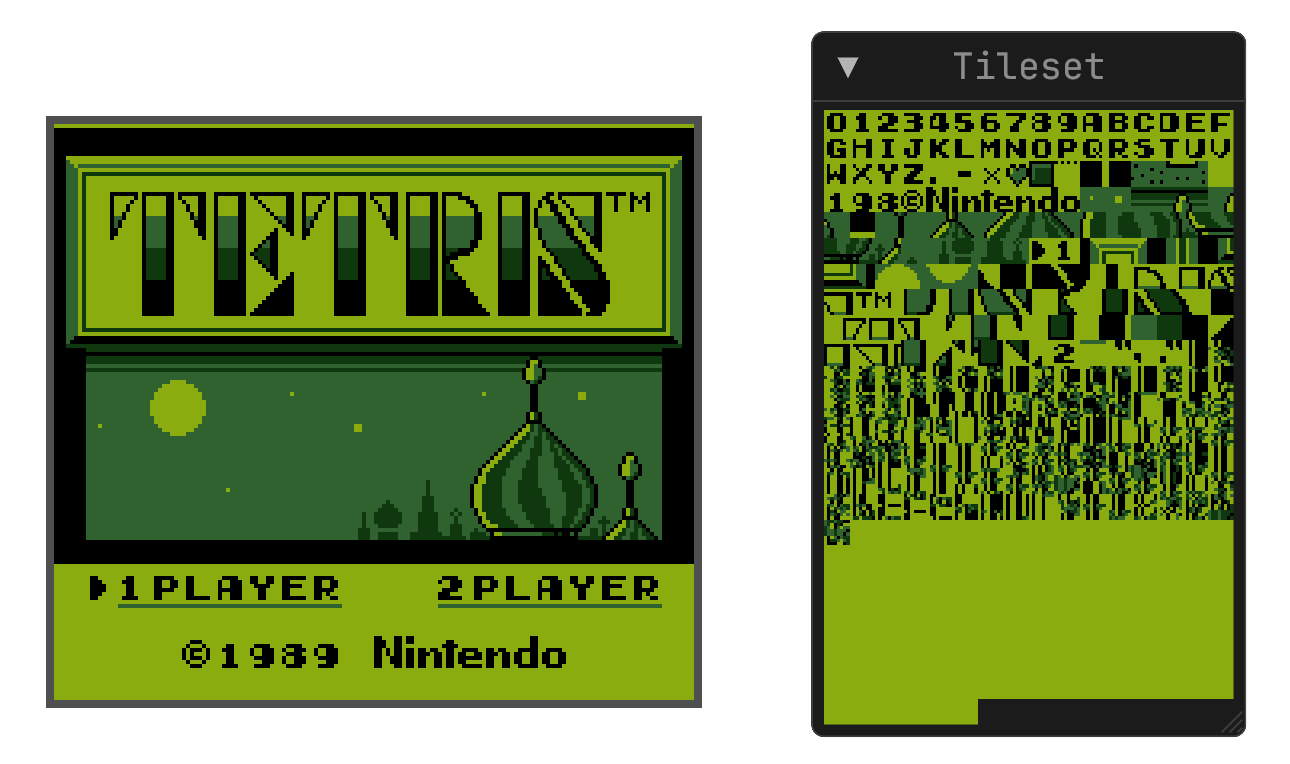
Tileset viewer
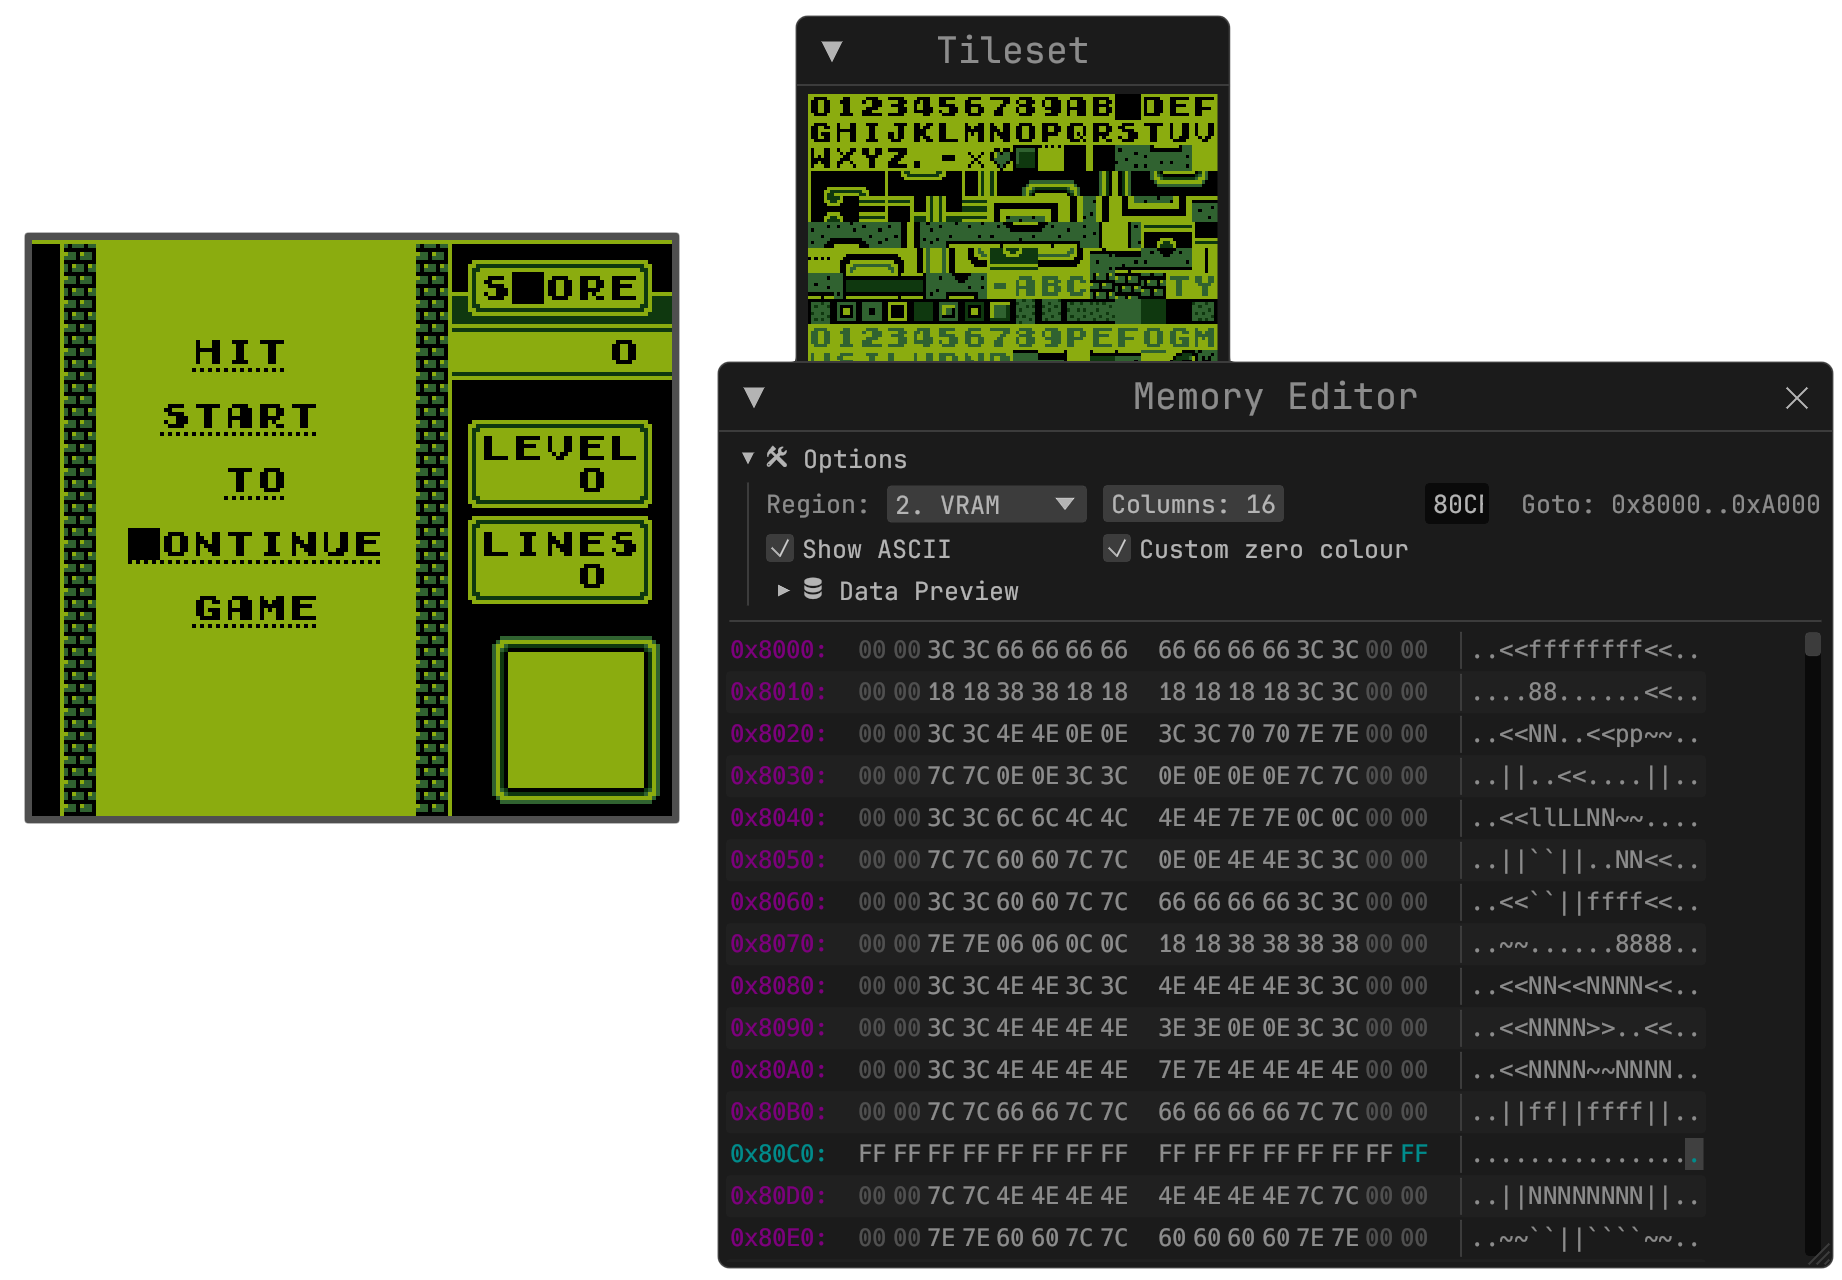
Editing Tetris VRAM on-the-fly
Legal/ethical grey-area
Finally, we get to the most touchy subject: legality and ethics. For this, I will simply quote the wise words of… my dissertation background section.
The law around emulation was carefully considered throughout the project in order to stay in line with current legislation at all times. Two main legal issues were addressed before starting development on the emulator. The first is a privately licensed segment of code embedded in the Game Boy hardware called the bootrom, and the second is the distribution of ROM files that contain privately licensed game data. The emulator cannot (and does not) contain any privately licensed content or infringe on any trademark/copyright laws, the following paragraphs discuss how this was achieved.
Bootrom
The Game Boy’s bootrom is the first piece of code to be executed when the device is powered on. The bootrom sets up the hardware by initialising RAM and subsystems like the APU & PPU. The final operation that the bootrom makes is to check that a certain region of the game ROM contains a valid Nintendo logo [27]. The purpose of this was originally to “prevent the execution of unauthorised cartridges” [7] on the Game Boy. If a bootlegger wanted to make an unauthorised game they had to embed the trademarked Nintendo logo for the check to be able to pass in order for the Game Boy to be able to play it [36]. When developing a Game Boy emulator this is a non-issue as long as no bootrom is distributed to users, that a custom-made publicly licensed bootrom that skips the Nintendo logo check operation is used [4], or that the state is manually set by the programmer before executing a game.
ROM files
The largest legal issue in emulation is the distribution of copyrighted video games. Downloading ROM files for games you don’t own is strictly illegal. There is, however, no legal precedent against extracting ROM files from cartridges you own, and it’s generally considered to fall under fair use [30]. For this reason, the emulator was only tested against games that I own and have extracted the cartridge data for. Additionally, the emulator was tested against open-source ‘homebrew’ games that have been created by the Game Boy development community and contain no copyrighted material [14]. Finally, similar to these homebrew games, there exist open-source ROM files for the purpose of checking that an emulator meets the requirements of the original hardware [32].
With all that being said, I’m thankful the university allowed me to carry out this project, since it would be safer and easier for them to just say no.
Emulation
Interrupts
The system analysis section contained an example of how the joypad interrupt would be handled by the system, and likewise, this section will show the implementation of interrupt handling in the joypad class, as well as the code responsible for servicing the interrupts.
Requesting an interrupt
[The listing below] shows a condensed view of the
Joypad::update()function, which gets called approximately every 1/60th of a second. The significant line of code in this listing is line 8, where the Joypad class callsMmu::request_interrupt()if more than 0 buttons are currently pressed.
pub fn update(mmu: &mut Mmu, pressed: &[Button]) {
    let mut control = mmu.get(JOYP); // JOYP = 0xFF00
    control |= 0x0f; // Clear the previous button presses

    /* Store button presses { ... } */

    if !pressed.is_empty() {
        mmu.request_interrupt(4);
    }
}
[The listing below] shows the
Mmu::request_interrupt()function which simply takes an id corresponding to whichever interrupt was requested and sets the correct bit of theIF(Interrupt Flag) using bitwise operators.
pub fn request_interrupt(&mut self, id: u8) {
    let mut interrupt_flag = self.get(0xFF0F);
    interrupt_flag |= 1 << id;
    self.set(0xFF0F, interrupt_flag);
}
Servicing an interrupt
[The listing below] shows the
Cpu::service_interrupts()function which first checks to make sure that IME, IE aren’t blocking interrupts and then scans through each interrupt ID to check if it exists inIF. If the interrupt is inIF(i.e. has been requested) then theCpu::service_interrupt()function on line 15 is called.
pub fn service_interrupts(&mut self) {
    let interrupt_flag = self.mmu.get(0xFF0F);
    let interrupt_enable = self.mmu.get(0xFFFF);
    if self.status == Halt && (interrupt_flag & interrupt_enable> 0) {
        self.status = Running;
    }
    // Guards
    if !self.ime || interrupt_flag == 0 {
        return;
    }
    // Service the next interrupt
    for i in 0..5 {
        // If interrupt 'i' is set
        if ((interrupt_flag & interrupt_enable) >> i) & 1 == 1 {
            self.service_interrupt(i, interrupt_flag);
            break;
        }
    }
}
[The listing below] shows the
Cpu::service_interrupt()function which first sets theIMEto 0, clears the interrupt that’s about to be serviced, and then finally calls the interrupt subroutine. If the interrupt had an ID of 1 (LCD) then the subroutine at0x48would be called.
pub fn service_interrupt(&mut self, id: u8, interrupt_flag: u8) {
    self.ime = false;
    let cleared = interrupt_flag & (0b1111_1111 ^ (1 << id));
    self.mmu.set(0xFF0F, cleared);

    self.push_word(self.reg.pc); match id {
        0 => self.reg.pc = Interrupt::VBlank as u16, // 0x40
        1 => self.reg.pc = Interrupt::LCD as u16, // 0x48
        2 => self.reg.pc = Interrupt::TIMER as u16, // 0x50
        3 => self.reg.pc = Interrupt::SERIAL as u16, // 0x58
        4 => self.reg.pc = Interrupt::JOYPAD as u16, // 0x60
        _ => ()
    }
}
To be continued?
This is about as much as I can write for now. I’ll move onto writing up some other portfolio projects for now. If any reader wants me to continue this section, please get in touch and let me know. My email is on the homepage of this site.
If you’re interested in seeing my project for Video Games Programming, check out Kiwi’s Delivery Service. ↩︎